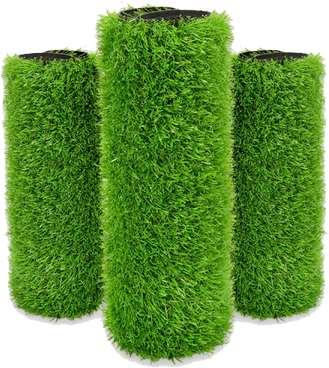

Fitting artificial grass involves more than simply rolling out the turf and cutting it to size. The finished lawn depends on getting the positioning, pile direction, cuts, joins and edges right.
If the ground beneath the turf has already been properly prepared, the fitting process can be relatively straightforward. The key is to work carefully and avoid rushing the parts that affect the final appearance.
In this guide, we’ll focus specifically on how to fit artificial grass, including measuring, cutting, joining and securing the turf. For the full groundwork and base preparation process, see our guide to how to lay artificial grass.
- So… Is Artificial Grass Truly Safe for Children?
- What Makes Artificial Grass Safe for Children?
- How to Create a Child-Safe Artificial Grass Play Zone
- FAQs: What Every Parent Wants to Know
- Can kids play barefoot on artificial grass?
- Will artificial grass give my child rug burns?
- What if my child spills food or gets sick on the grass?
- Is it safe for babies and toddlers?
- Does artificial grass smell?
- Is it safe under the playground equipment?
- Will it help with allergies?
- Does artificial grass get too hot in summer?
Table of Contents
ToggleDoes Artificial Grass Get Hot in the Sun?
Before starting, make sure you have the right tools and materials. Having everything ready makes the fitting process much easier and reduces the risk of damaging the turf.
You’ll typically need:
- A tape measure
- A sharp utility knife
- Joining tape and suitable adhesive
- Fixing pins or pegs
- A stiff brush
- Gloves
- Knee pads for larger areas
You may also need additional edging or fixing materials depending on the shape and design of the garden.
The most important tool is arguably a sharp knife. Artificial grass needs to be cut from the backing rather than aggressively cutting through the visible fibres, so a blunt blade can make the job much harder and leave untidy edges.
Before fitting begins, make sure the base is firm, level and properly prepared. If the foundation isn’t right, even carefully fitted turf can eventually move, sink or develop visible imperfections.
Related Read: What Goes Under Artificial Grass? The Complete Sub-Base Guide
How Do You Fit Artificial Grass Step by Step?
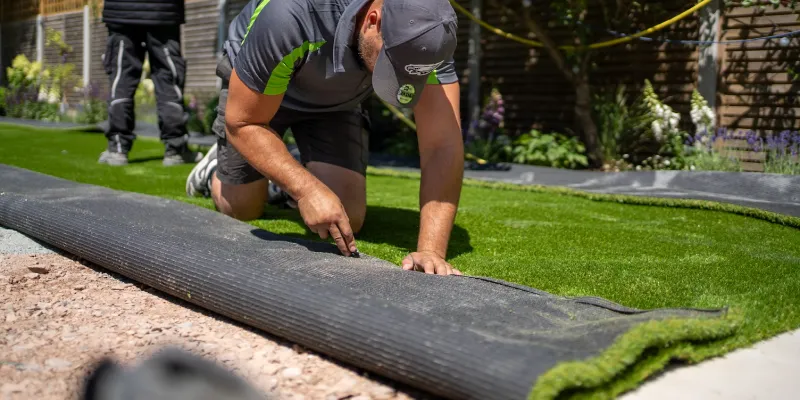
Once the base is properly prepared, fitting the turf is mainly about getting the positioning and finishing details right.
Take your time at this stage because small mistakes in cutting or alignment can remain visible once the lawn is finished.
Step 1. Measure the Area and Plan the Layout
Before cutting anything, measure the lawn carefully and work out how the turf will be positioned.
If you’re using more than one piece, plan where the joins will sit.
Try to keep joins away from prominent areas where possible, and make sure every piece will run in the same pile direction. Artificial grass can look noticeably different when viewed against the direction of the fibres, so getting this wrong can make even a well-fitted lawn look patchy.
It’s also worth checking your measurements twice before making any cuts. Once you’ve removed material, you can’t simply add it back.
Step 2. Position and Unroll the Artificial Grass
Lay the artificial grass across the prepared area and allow it to settle flat before making your final cuts.
Check the direction of the pile across the whole lawn and make sure the turf is sitting where you want it. If the grass has been tightly rolled, giving it time to relax can help reduce creases and make accurate fitting easier.
Don’t immediately start cutting around every edge. Position the turf first, check the alignment and then work gradually around the perimeter.
Step 3. Cut the Artificial Grass to Shape
When you’re ready to cut, turn the turf over where possible and use a sharp utility knife to cut through the backing.
Try to cut between the rows of stitches rather than through the visible grass fibres. This helps create a cleaner edge and reduces the chance of damaging the pile.
Work slowly around walls, borders, corners and other obstacles. It’s better to make several small cuts and check the fit as you go than to remove too much material in one attempt.
For awkward curves or irregular garden shapes, mark your intended cutting line first and leave a small amount of extra material until you’re confident the fit is correct.
Step 4. Join Multiple Pieces of Artificial Grass
If your lawn requires more than one piece, the join needs careful preparation.
Lay both sections in position with the pile running in the same direction. Trim the edges neatly, then place joining tape underneath the seam and apply the appropriate artificial grass adhesive.
Bring the two sections together carefully, making sure grass fibres aren’t trapped in the adhesive.
A good join should be difficult to notice once the fibres are brushed upright. Don’t rush this stage because a poorly aligned seam can remain visible even after the rest of the lawn is finished.
Step 5. Secure the Artificial Grass
Once the turf is correctly positioned and any joins have been completed, secure the perimeter so the grass can’t move or lift.
Fixing methods depend on the surface and edging beneath the turf. Pins or nails can be suitable for appropriate ground or timber edging, while adhesive may be used for some hard surfaces.
The important thing is that the fixing method matches the installation surface and keeps the edges firmly in place.
Pay particular attention to corners and edges, as these areas are more likely to lift if they’re not secured properly.
Step 6. Brush the Turf and Finish the Surface
The final step is to brush the grass fibres upright and check the lawn from different angles.
Brushing helps separate fibres that may have been flattened during fitting and gives the finished lawn a more natural appearance.
If the particular turf system requires infill, this should be distributed according to the manufacturer’s recommendations and brushed through the pile.
Finally, walk around the lawn and inspect the edges, joins and overall surface. It’s much easier to correct a small fitting issue now than after the installation has been completed.
Also Read: How Often Should You Brush Artificial Grass? The Complete Guide
How Do You Fit Artificial Grass Around Edges and Curves?
Straight edges are relatively simple to deal with, but gardens often have curved borders, flower beds, trees, paving and other features that make fitting more challenging.
The key is to cut gradually and keep checking the fit rather than trying to achieve the final shape in one cut.
For curves, work from the outside towards the final edge and leave a small amount of spare turf while you’re shaping it.
You can then make smaller trimming cuts until the grass sits neatly against the border. This approach gives you more room to correct mistakes, which is important because artificial grass cannot be repaired once you’ve cut too much away.
When working around an obstacle, turn the turf over where possible and cut through the backing rather than the visible fibres. A sharp, clean blade will give you much more control and help prevent unnecessary damage to the pile.
Pay particular attention to corners and curved edges. The finished turf should sit naturally against the boundary without bunching, folding or leaving obvious gaps.
Recommended Read: How to Choose the Best Artificial Grass for Your Garden or Home
What Are the Most Common Artificial Grass Fitting Mistakes?
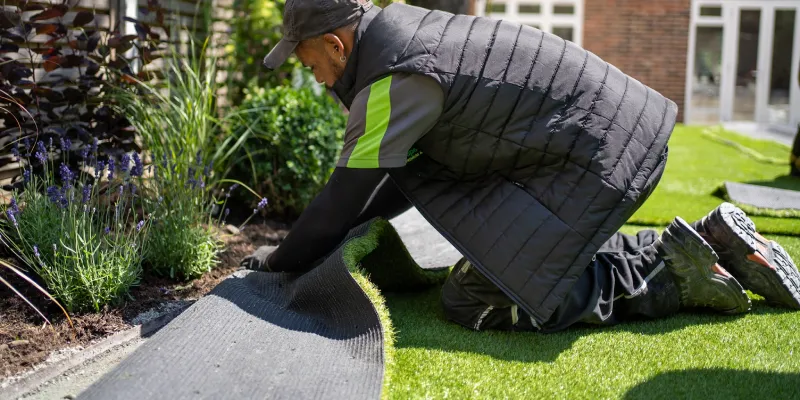
Even when the basic process seems straightforward, a few small mistakes can affect how professional the finished lawn looks.
Cutting the Turf Too Short
One of the easiest mistakes to make is removing too much material during trimming. Always cut conservatively and check the fit before making another cut.
A sharp knife and slow, controlled movements are much better than trying to force your way through the backing.
Mixing Up the Pile Direction
If you’re fitting more than one piece, make sure the fibres run in the same direction throughout the lawn.
Turning one section the wrong way can make it appear to have a noticeably different colour or texture, even though it’s the same product.
Making Joins Too Visible
Visible seams are often caused by poor alignment, inconsistent cutting or grass fibres becoming trapped beneath the join.
The two sections need to meet cleanly while leaving the appropriate gap specified for the particular turf system. Don’t force the backing edges tightly together, as this can make the seam more obvious.
Failing to Secure the Edges
The perimeter needs to be properly secured once the turf has been positioned.
Loose edges can lift or curl over time, particularly in areas that experience regular foot traffic. The appropriate fixing method depends on the edging and surface, so follow the turf manufacturer’s or installer’s recommendations rather than assuming one fixing method works everywhere.
Cutting Before the Turf Has Settled
Artificial grass can arrive tightly rolled, so giving it time to relax before making final cuts can make fitting easier.
Trying to complete all the trimming immediately can make it harder to judge the final position and may leave you working around temporary creases.
Trying to Fit Turf Over an Unprepared Base
Perhaps the biggest mistake is focusing on the turf while overlooking what’s underneath it.
Artificial grass needs a suitable, stable foundation. If the base is uneven, poorly compacted or has drainage problems, carefully fitted turf won’t solve those underlying issues.
That’s why fitting artificial grass should be treated as the finishing stage of an installation, rather than the entire installation itself.
For the groundwork involved in preparing the surface, our complete artificial grass laying guide covers that process in more detail.
Can You Fit Artificial Grass Yourself?
Yes, you can fit artificial grass yourself, particularly if you’re working with a small, straightforward garden and the groundwork has already been prepared correctly.
The fitting itself mainly involves positioning the turf, making accurate cuts, creating any necessary joins and securing the finished lawn.
The challenge is getting the details right.
Cutting around curves, keeping multiple pieces aligned and creating joins that are difficult to see all require patience and accuracy. Poor fitting can leave visible seams, loose edges or sections that don’t sit correctly.
For a simple lawn, DIY artificial grass fitting may be manageable if you have the right tools and are comfortable working carefully.
Larger or more complicated gardens are a different matter, especially where there are several pieces of turf, awkward shapes, slopes or drainage considerations.
It’s also important to remember that fitting is only one part of an artificial grass installation.
If the existing ground or base needs excavation, levelling, drainage work or substantial preparation, the project becomes considerably more involved.
When Should You Hire a Professional to Fit Artificial Grass?
Professional fitting can be worthwhile when the lawn is large, unusually shaped or requires several sections to be joined.
Getting the seams, edges and pile direction right across a complicated layout takes experience, and mistakes can be difficult to correct once the turf has been cut.
You should also consider professional installation if the existing ground isn’t suitable for turf.
Problems with the base, drainage or levels need to be addressed before the grass is fitted. Simply covering an unsuitable surface can lead to movement, uneven areas and drainage problems later.
At Superior Lawn, we provide professional artificial grass installation for homeowners across London.
If you’re unsure whether your garden is suitable or how much preparation it needs, we can assess the space and recommend the right approach rather than leaving you to work it out yourself.
For a larger project, professional fitting also means you don’t have to worry about sourcing specialist equipment, handling large rolls of turf or trying to make difficult joins look neat.
If you’d like to discuss your garden, we also offer free surveys across London, so you can understand what’s involved before committing to the installation.
If you’re choosing a new lawn, look beyond appearance. A good artificial grass for dogs should be selected with drainage, durability and everyday pet use in mind.
Frequently Asked Questions
How do I fit artificial grass?
Once the base is properly prepared, fitting involves positioning the turf, checking the pile direction, cutting it to shape, joining multiple pieces where necessary and securing the edges. The final step is to brush the fibres upright and check the finished surface.
Can I fit artificial grass myself?
Yes, a small and straightforward lawn can often be fitted as a DIY project. However, larger gardens, complicated shapes, multiple joins or ground preparation issues can make professional installation a better option.
How do you cut artificial grass?
Use a sharp utility knife and cut through the backing rather than aggressively cutting through the visible fibres. Make small, controlled cuts and check the fit regularly, particularly around curves and corners.
How do you join artificial grass?
Lay the pieces with their pile running in the same direction, align the edges carefully and use suitable joining tape and adhesive beneath the seam. A clean, accurately aligned join should be difficult to notice once the fibres are brushed upright.
How do you secure artificial grass?
The appropriate fixing method depends on the surface and edging. Fixing pins, nails or adhesive may be used depending on the installation. Edges, corners and seams should receive particular attention to prevent movement or lifting.
Can artificial grass be laid directly on soil?
It’s generally not recommended to simply lay artificial grass directly over existing soil. The ground normally needs to be cleared, levelled and prepared with a suitable base first. This helps provide the stability and drainage the finished lawn needs.
Do you need to glue artificial grass down?
Not necessarily across the entire lawn. The appropriate fixing method depends on the installation and surface. Adhesive is commonly used for joins and may also be suitable around certain edges, while pins or other fixings can be used in appropriate areas.
How long does it take to fit artificial grass?
The time depends on the lawn’s size, shape, number of joins and amount of preparation required. A small, straightforward area can be relatively quick, while larger or more complicated gardens can take considerably longer.
Is fitting artificial grass difficult?
The basic process isn’t necessarily complicated, but achieving a neat professional finish requires accuracy. Cutting, joining, maintaining the correct pile direction and securing the edges are the areas where DIY projects can become challenging.